Swift has been surfing the news waves quite some time by now even more after the Open Source Announcement. I have given the though of learning it day one, and to say the truth I read the Apple’s intro book when the first version came off, the problem was I didn’t wanted to commit to the language at that time.
I believe that the way to learning some kind of stuff, like programming languages, is through practicing. So this series of posts will present the birth of a simple Todo App from ground zero to the point it is exhausted, at least the point I think it is.
Check the code in my github repo
First steps
- Did you get latest Xcode? Some Swift enable version please
- Create a single view application, remember to enable tests
Now the project have:
- A view controller
- Main and LaunchScreen storyboards
- The famous AppDelegate, if you’re an iOS developer
Pro tip: If you’re lost about the basics I strongly recommend to check the intro book mentioned before, is quite helpful
Why storyboard? This app isn’t complex enough that demands a nib or frame approach, and if that became true in the future then it can always be changed. Here is a post by Antonio Bello from Toptal dwelving further into the subject.
Todo Model
The todo item during this step is composed by two things:
- content: the text that an user input as a to do
- completed: the field that stores if that to do was completed
Also I added a bonus static method sample to create some pre-inserted data.
class TodoModel {
    var content: String
    var completed: Bool

    init (content: String) {
        self.content = content
        self.completed = false
    }

    static func sample() -> [TodoModel] {
        var data = [TodoModel]()
        data.append(TodoModel(content:"Pay the bills"))
        data.append(TodoModel(content:"Fix bike"))
        data.append(TodoModel(content:"Schedule Medic"))
        data.append(TodoModel(content:"Get more dog food"))
        data.append(TodoModel(content:"Call jenny to schedule dinner"))
        data.append(TodoModel(content:"Invite Bob to play basket"))
        data.append(TodoModel(content:"Buy ticket to see this week Golden State game"))
        return data
    }
}
Todo list Cell - UITableViewCell
I created a simple UITableViewCell file just to store a checkbox image (UIImageView) and a title label, as long as switching the checkbox image properly. Also I want to improve the cell in the future.
class TodoTableViewCell: UITableViewCell {
@IBOutlet weak var checkboxImg: UIImageView!
@IBOutlet weak var titleLabel: UILabel!
func switchCheckbox(checked: Bool) {
if checked {
checkboxImg.image = UIImage(named: "checked")
}
else {
checkboxImg.image = UIImage(named: "unchecked")
}
}
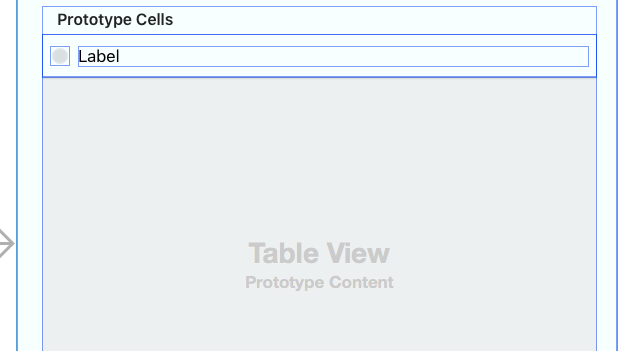
}Important to note that I built the cell UI directly into storyboard, to do that:
- Table view content is at Dynamic Prototypes
- Prototype Cells is set to 1
- Changed the class to
TodoTableViewCell - Set identifier to the same used in the TodosViewController
Todo list ViewController
Almost there, the only thing left is the ViewController. I didn’t mention how everything would work right?
Well the idea is similar to the todomvc online sample, at least the visual is and some features, not the code.
Initial features:
- user can add a new todo in a simple input field
- each new item is added to both all and todo lists
- if the user check it as completed then the item is marked as completed, when unchecked we rollback the action
- there are three states for the view: all, todo and completed lists. they are filter results from the all list
- an user can remove a todo swiping left
What is used in the view
- A toolbar (with all, todos and completed items)
- Input field
- Table view to show todos
Each section of code is commented and I made everything in the same class with the purpose of improving the code gradually.
class TodosViewController: UIViewController, UITextFieldDelegate, UITableViewDataSource, UITableViewDelegate {

    //MARK: Properties
    @IBOutlet weak var txtFieldTodo: UITextField!
    @IBOutlet weak var tblViewTodos: UITableView!
    @IBOutlet weak var toolbar: UIToolbar!

    // allTodos is the unfiltered list, todosData store the filtered list
    var todosData: [TodoModel] = [];
    var allTodos: [TodoModel] = [];

    // this field is a trick to easily keep track of filter state, since its either all (nil), todos (false), completed (true)
    var completedFilter: Bool? = nil

     override func viewDidLoad() {
         super.viewDidLoad()
         txtFieldTodo.delegate = self
         todosData = TodoModel.sample()
         allTodos = todosData
     }

     // MARK: UITextFieldDelegate
     // Methods to receive input and add new item properly
     func textFieldShouldReturn(textField: UITextField) -> Bool {
         textField.resignFirstResponder()
         return true
     }

     func textFieldDidEndEditing(textField: UITextField) {
         if let newItem = textField.text {
             let newTodo = TodoModel(content: newItem)
             todosData.append(newTodo)
             allTodos.append(newTodo)
         }
         tblViewTodos.reloadData()
         textField.text = ""
     }

     //Mark: UITableViewDelegate/DataSource
     // Add each todo as a cell and controls the table view
     func tableView(tableView: UITableView, cellForRowAtIndexPath indexPath: NSIndexPath) -> UITableViewCell {
         let cell = tableView.dequeueReusableCellWithIdentifier("reuseIdentifier", forIndexPath: indexPath) as! TodoTableViewCell

         let todo = todosData[indexPath.row]
         cell.titleLabel.text = todo.content
         cell.switchCheckbox(todo.completed)

         return cell
     }

     func tableView(tableView: UITableView, numberOfRowsInSection section: Int) -> Int {
         return todosData.count
     }

     func numberOfSectionsInTableView(tableView: UITableView) -> Int {
         return 1
     }

     func tableView(tableView: UITableView, commitEditingStyle editingStyle: UITableViewCellEditingStyle, forRowAtIndexPath indexPath: NSIndexPath) {
         if editingStyle == .Delete {
             let todo = todosData[indexPath.row]
             var removeIndex = -1
             for i in 0..<allTodos.count {
                 if allTodos[i].content == todo.content {
                     removeIndex = i
                     break
                 }
             }
             if removeIndex != -1 {
                 allTodos.removeAtIndex(removeIndex)
             }
             todosData.removeAtIndex(indexPath.row)
             tableView.deleteRowsAtIndexPaths([indexPath], withRowAnimation: .Fade)
         }
     }

     func tableView(tableView: UITableView, canEditRowAtIndexPath indexPath: NSIndexPath) -> Bool {
         return true
     }

     func tableView(tableView: UITableView, didSelectRowAtIndexPath indexPath: NSIndexPath) {
         let todo = todosData[indexPath.row]
         todo.completed = !todo.completed
         filterTodos()
         tblViewTodos.reloadData()
     }

     //Mark: UIToolbarDelegate
     func selectToolbarItem(completedFilter: Bool?) {
         self.completedFilter = completedFilter
         filterTodos()
         tblViewTodos.reloadData()
     }

     func swapTabItemsColors(selectedItem: UIBarButtonItem) {
         self.toolbar.items!.forEach({ (item: UIBarButtonItem) -> () in
             item.tintColor = UIColor(red: 216/255.0, green: 222/255.0, blue: 227/255.0, alpha: 1)
         })
         selectedItem.tintColor = UIColor(red: 127/255.0, green: 219/255.0, blue: 118/255.0, alpha: 1)
     }

     @IBAction func selectedToDos(sender: UIBarButtonItem) {
         swapTabItemsColors(sender)
         selectToolbarItem(false)
     }

     @IBAction func selectedAll(sender: UIBarButtonItem) {
         swapTabItemsColors(sender)
         selectToolbarItem(nil)
     }

     @IBAction func selectedCompleted(sender: UIBarButtonItem) {
         swapTabItemsColors(sender)
         selectToolbarItem(true)
     }

     //Mark: Filter todos
     func filterTodos() {
         // Uses Ruby magic to filter the array, oh wait....
         todosData = allTodos.filter { (TodoModel) -> Bool in
             return completedFilter == nil || TodoModel.completed == completedFilter
         }
     }
 }
Conclusion
- Swift is quite beautiful to read and type
- Is quite easier to create an iOS app if you already did it before in ObjC
- It is not that hard if you don’t know ObjC
- Reminds me of Ruby and Rust
- Has some interesting features, watch this… this will have changed someday so pay a visit to swift.org
Future improvements
- Add unit tests
- Code quality
- Local data persistence
- Web data persistence
- Cell improvement with date
- Item editing
- Others…