TL;DR: Just want the results? Check my profile at Github.
Context
A trend was not aware is homelabs/homeservers which seem to be on the rise as people seek more control and security over their personal data.
Given the multiple data leaks, LGPD, GDPR, AI using everything and anything from everyone’s lives through companies that care little or doens’t care at all because they’re profit-driven, it’s more than justifiable that more people are taking back control of what they own.
All this came to mind after I started planning putting to work this old Mac Mini I had sitting around doing absolutely nothing. Thus began the birth of my home server.
Ok, so what now?
I organized my research and realized I wanted to make things easier for myself, so I discovered the open source system CasaOS, a hub that can be installed directly on a Linux machine and turns it into an access point for movies, photos, files, and more.
CasaOS is a community-based open source program focused on providing simplicity in creating and managing a home cloud.
It does much more than just being a home cloud, as it allows the creation of extensions and apps that handle specific tasks and actions, making it flexible and ready for personal server construction.
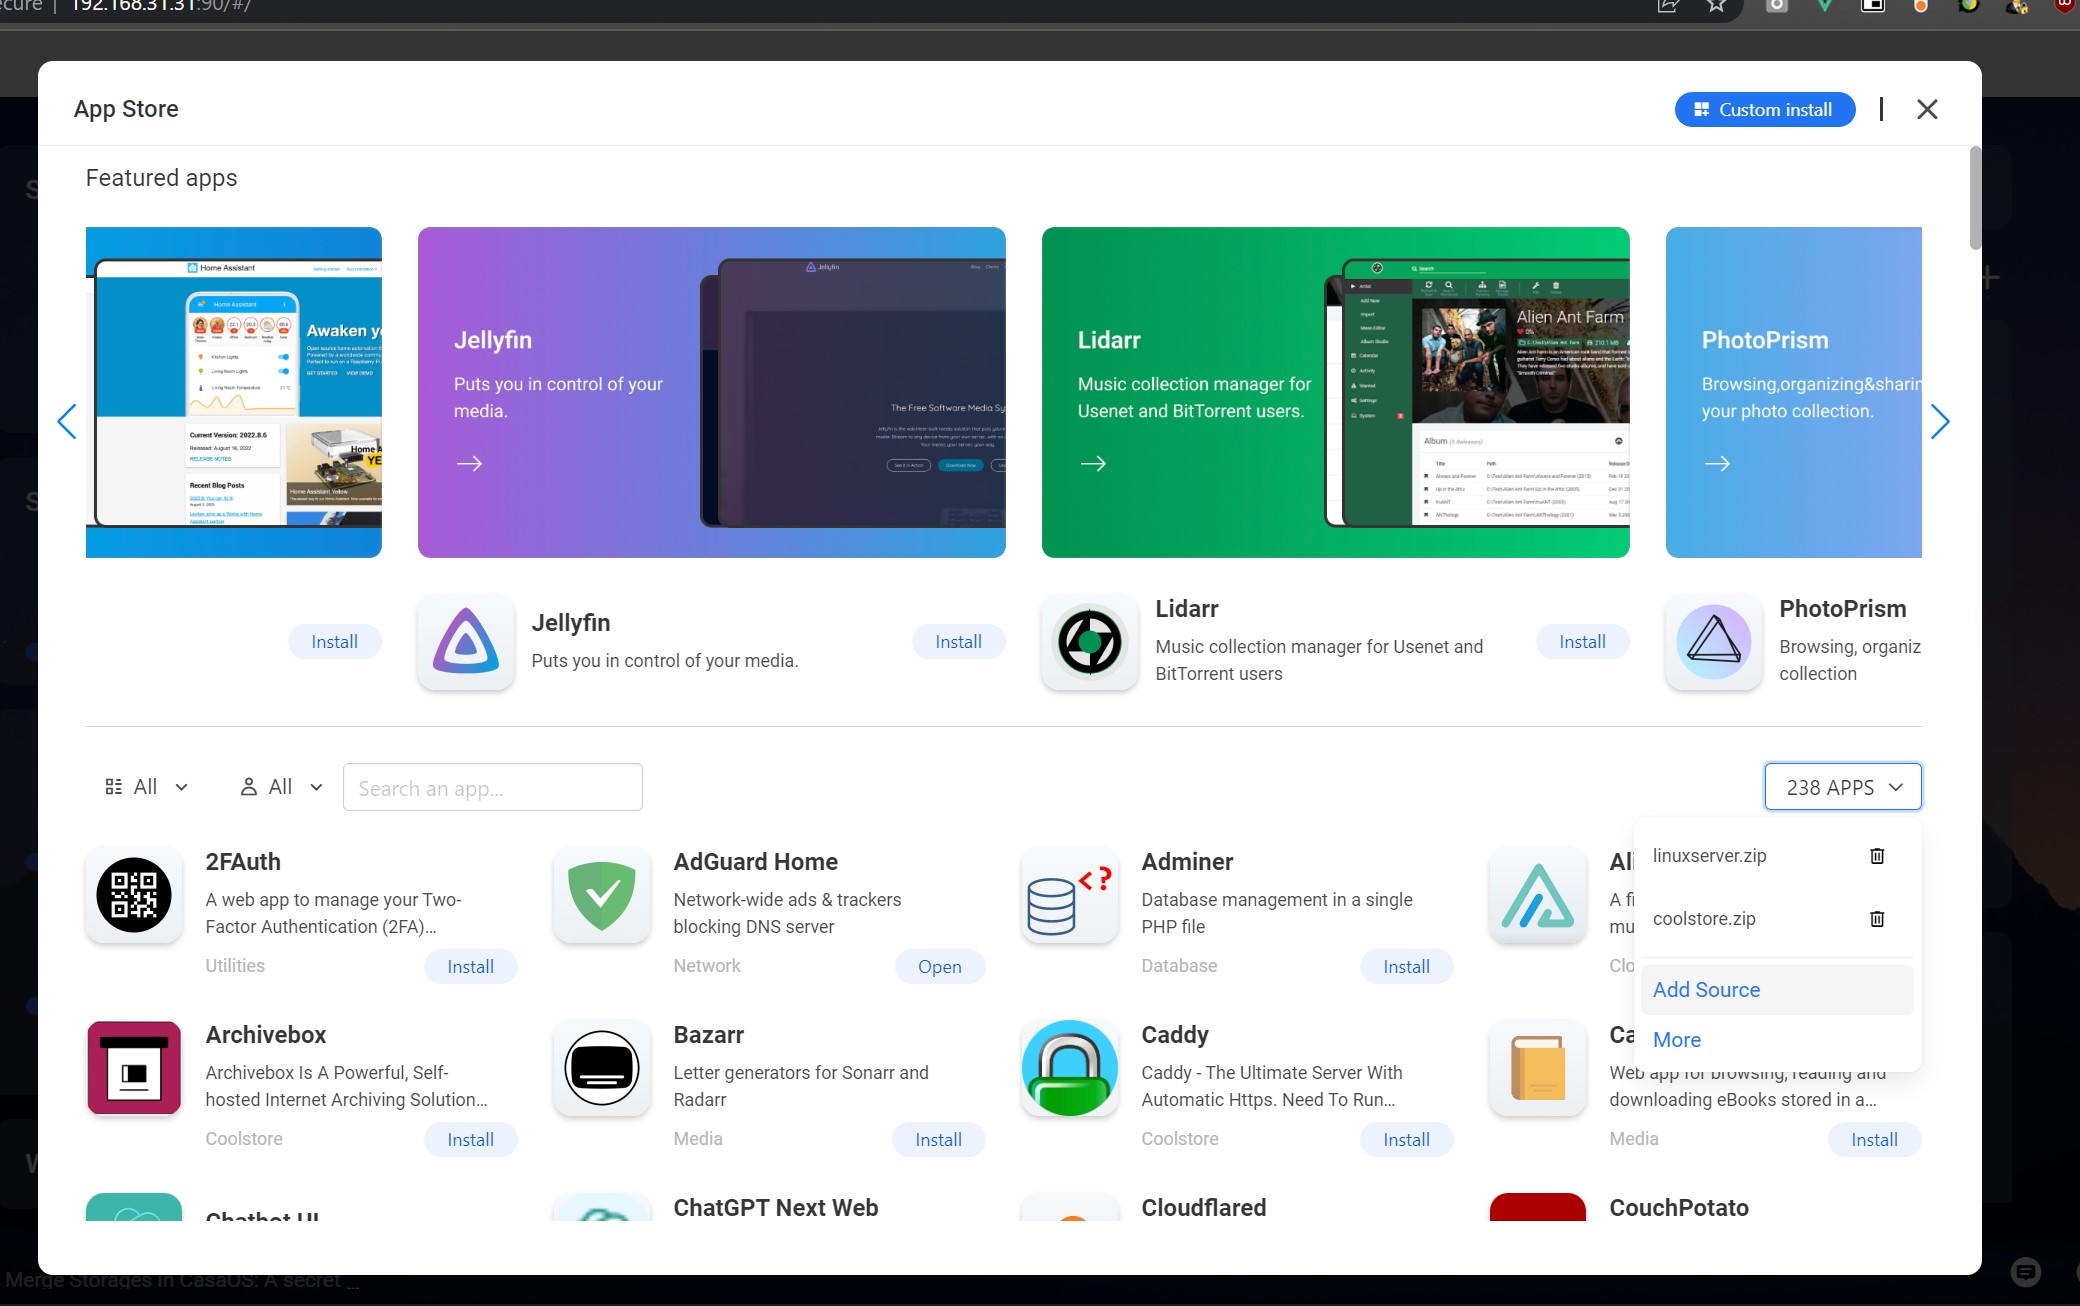
Examples:
- 2FA;
- Ad blocker;
- File synchronizer;
- Music library;
- Home automation;
- Photo library;
And on MacOS?
There isn’t a build that works directly on Mac at the time of this article being written. Solution: VM.
To automate the configuration and control of this VM more easily, I found this post by Junian, which suggests using Colima for this task.
Clearly an automatable sequence:
brew install colima
colima start --vm-type=vz --network-address
colima ssh
curl -fsSL https://get.casaos.io | sudo bash
Translating: 1 - Install Colima using Homebrew 2 - Start configuring a container (VM) with host network access (mac mini in my case). Colima creates a container with the default name “default” 3 - Access the VM via SSH 4 - Download the CasaOS setup script and run it with admin permissions and bash
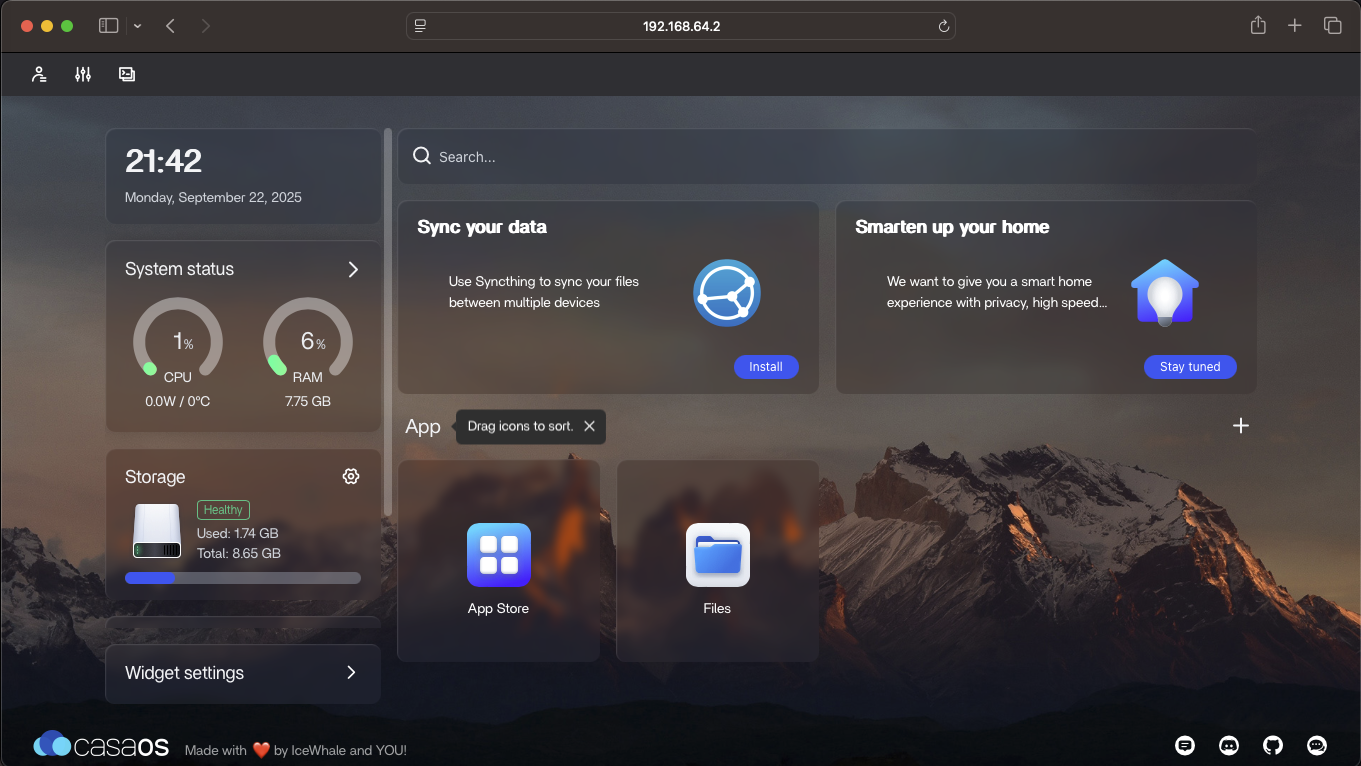
The result is accessing CasaOS via IP shown on terminal after execution.
And the automation?
This part required a good amount of learning and experimentation.
After testing everything needed and making a considerable number of mistakes, the final process was split into two scripts: one bash and one python.
I chose Python for familiarity, the vast amount of online resources, and because it’s usually already installed on Mac. A good alternative would be Rust.
Another decision was whether or not to support automation on Linux as well; I chose to do so.
I also decided to use Homebrew because I consider it a reliable solution for managing installations on Mac.
The other two necessary tools are Docker and Colima itself.
Lastly, there’s CasaOS.
Python check in bash
jarbas.sh checks if Python is present or not.
For this, I just used the command command:
if command -v python3 >/dev/null 2>&1; then
Right after, just use Homebrew or apt-get, or another tool to install Python (in this case v3).
$ brew install python3
$ sudo apt-get update
$ sudo apt-get install -y python3
Everything else is in Python
Inside the jarbas.py script is all the setup and startup logic. You can also remove the entire environment here, in case updates are made to the setup/teardown of the home server.
For installations, I just used subprocess to run the package manager.
The exceptions are Homebrew and CasaOS, which have their own bash scripts.
Setting up the container/vm with Colima
At this point, I considered the following:
1 - What if you want to run a container with another name? - In Colima, this is called profile
2 - How to determine the environment specs so it’s set up with a suitable standard?
3 - How to know if a container already exists and is running?
1 & 2
The profile is easily set with the –profile parameter.
Then the specs can be set directly in the command via parameters:
- –cpu
- –memory
- –disk
- –network-address
- –vm-type
Alternatively, jarbas.py could call colima template, which lets you edit the default.yaml file used by Colima when creating containers without terminal parameters.
3
The output of colima list is enough to determine a lot of information, and a simple string split with a loop solves it. Following is the output of the command.
| PROFILE | STATUS | ARCH | CPUS | MEMORY | DISK | RUNTIME | ADDRESS |
|---|---|---|---|---|---|---|---|
| casaosenv | Running | x86_64 | 4 | 8GiB | 10GiB | docker | 192.168.64.2 |
def colima_profile_exists(profile_name: str) -> bool:
	try:
		result = subprocess.check_output(['colima', 'list'], text=True)
		lines = result.strip().split('\n')
		# Skip header line
		for line in lines[1:]:
			columns = line.split()
			if columns and columns[0] == profile_name:
				return True
		return False
	except Exception as e:
		print(f"Error running colima list: {e}")
		return False
Wrapping up with CasaOS on Colima
This part was the hardest of all, the challenge? Running an SSH command and inside the container executing the CasaOS bash script.
A lot of documentation reading, trial and error, and the good old “get in the car, get out of the car”, and the solution was found.
subprocess.run(['colima','ssh','-p',env_name],
input='curl -fsSL https://get.casaos.io | sudo bash',
stdout=subprocess.PIPE, text=True, stderr=subprocess.PIPE)
It looks simple, but the trick was using the input parameter of the subprocess run function.
And why wasn’t this easy? Because the SSH session is started for human interaction, not for automation, and to use a Python SSH client you’d need security parameters, user/password/key, so in the end it was possible to simplify and just use subprocess, avoiding unnecessary complexity for this case.
Extra
Since the environment is accessed via an IP, I added the get_colima_ip function to provide its value at the end of the process to know how to access CasaOS.
This could be done again with colima list, but using regex on the colima status "profile" output allow for more practice.
def get_colima_ip(profile_name: str) -> str:
	try:
		result = subprocess.run(['colima', 'status', profile_name],
		 text=True,stdout=subprocess.PIPE, stderr=subprocess.PIPE)
		match = re.search(r'address:\s*([0-9]+\.[0-9]+\.[0-9]+\.[0-9]+)',
		 result.stdout or result.stderr)
		if match:
			return match.group(1)
		else:
			print("IP address not found in output.")
	except Exception as e:
		print(f"Error running colima status: {e}")
	return ""
Conclusion
With the Jarbas scripts, you can freely experiment inside the container and even make the whole environment unusable. Just run python3 jarbas.py -destroy and python3 jarbas.py -setup_casaos and a new environment will be ready for new experiments.
See the full result on my Github profile.
Next steps
Provisioning the environment to avoid losing good results that need to be present after setting up CasaOS.
References
- Bash.
- Python.
- Homebrew.
- Docker.
- Colima.
- subprocess documentation.
- FAQ for Colima.
- Junian - How to Install CasaOS on macOS.
- CasaOS main page.